Hire me
Do you have a project you need help with? Would you like to improve your processes to work faster and more efficiently? Contact me for a free consult to see if I can help, let's get you and your team being productive and shipping products.
After spending more time than necessary to get a Hugo site working on AWS with Cloudfront I decided to write this blog post not just for the other poor souls running into this problem but also for myself because I tend to forget shit 🙃
Anyways, let’s cut to the chase it’s a Sunday and I should be getting drunk and the edible hasn’t kicked in yet 😏
Hosting a static site on S3 is pretty straight forward. Upload your HTML files to your bucket, make the bucket public, and enable static website hosting. That is until you need to use a custom domain with an SSL certificate for your site, you’re already invested in the AWS ecosystem so you say I’ll just use cloudfront 🥴 and so the pain begins.
Well in doing so you will run into the issue of origin links (links like https://benmarte.com/blog/) giving you a 403 access denied error as soon as you get your SSL certificate and create that Cloudfront Distribution. So how do we fix this issue?
The solution to this problem has way more steps than it should but hey you wanted to use AWS (or maybe you don’t but your client does) :face_with_rolling_eyes: so lets start with the settings you should enabled on your S3 bucket.
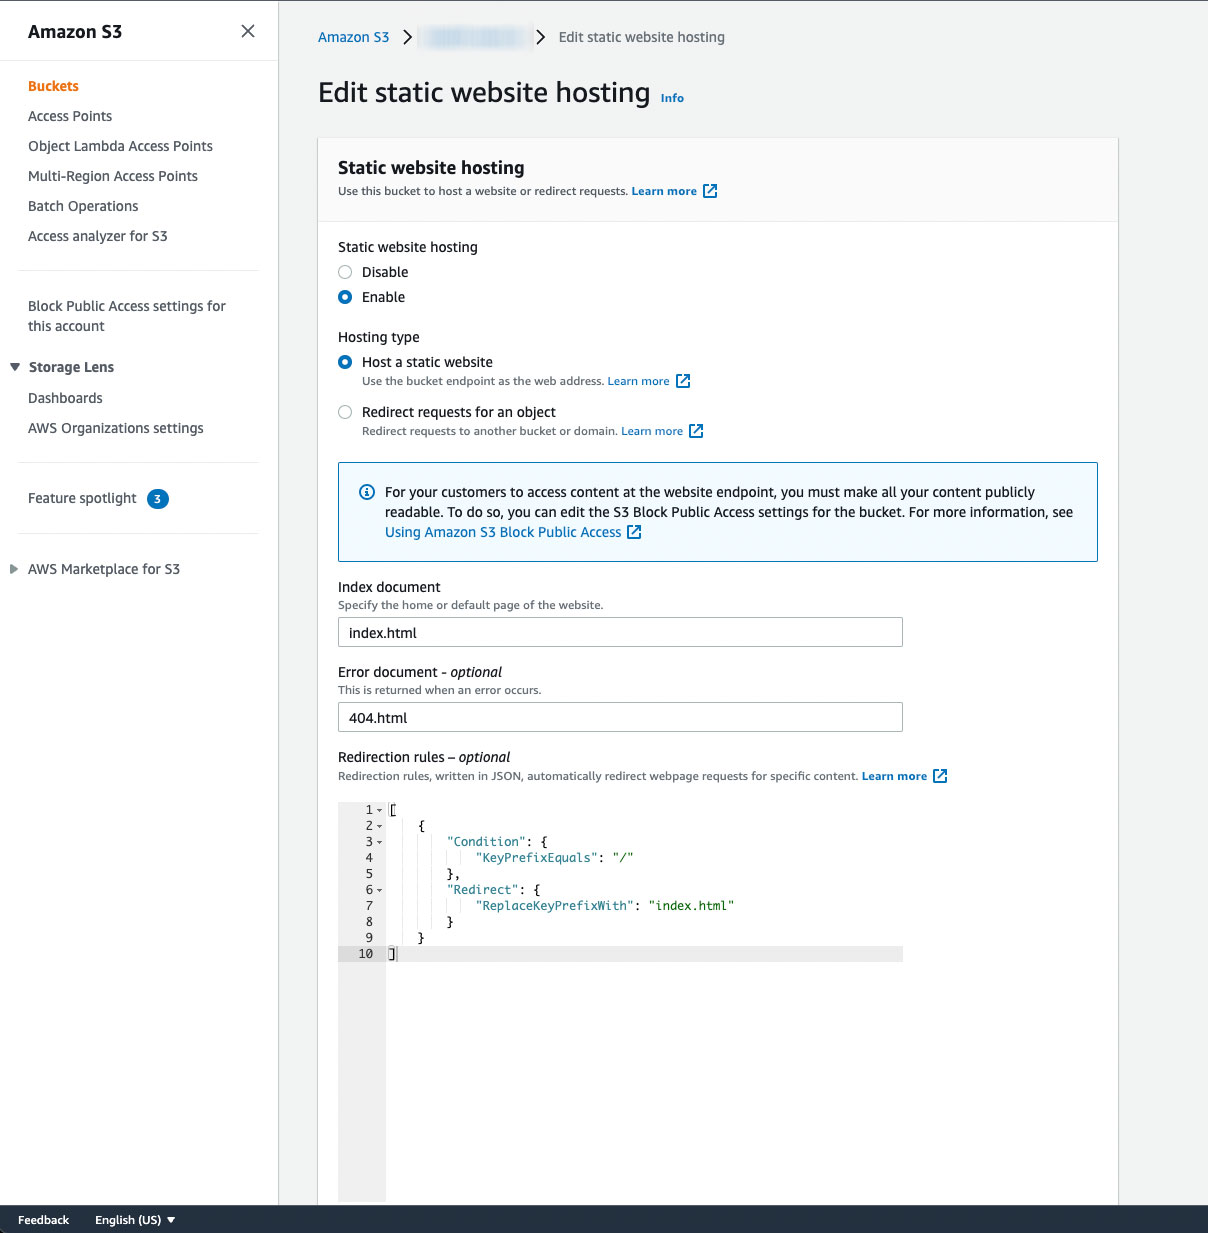
Head over to your S3 bucket and click on Properties scroll all the way down to Static website hosting and click edit.
We need to make a few edits here in order to get our site playing nice with Cloudfront.
First in the Index document input field type index.html
In the Error document input type in the name of your error page, hugo ships with a default 404.html page so that is what we will use if you have a different error page jsut put the name of it here.
Next we need to add a URL rewrite rule for all origins ending in / like so:
[
    {
        "Condition": {
            "KeyPrefixEquals": "/"
        },
        "Redirect": {
            "ReplaceKeyPrefixWith": "index.html"
        }
    }
]
Your Static website hosting settings should look something like this now.
Click Save changes
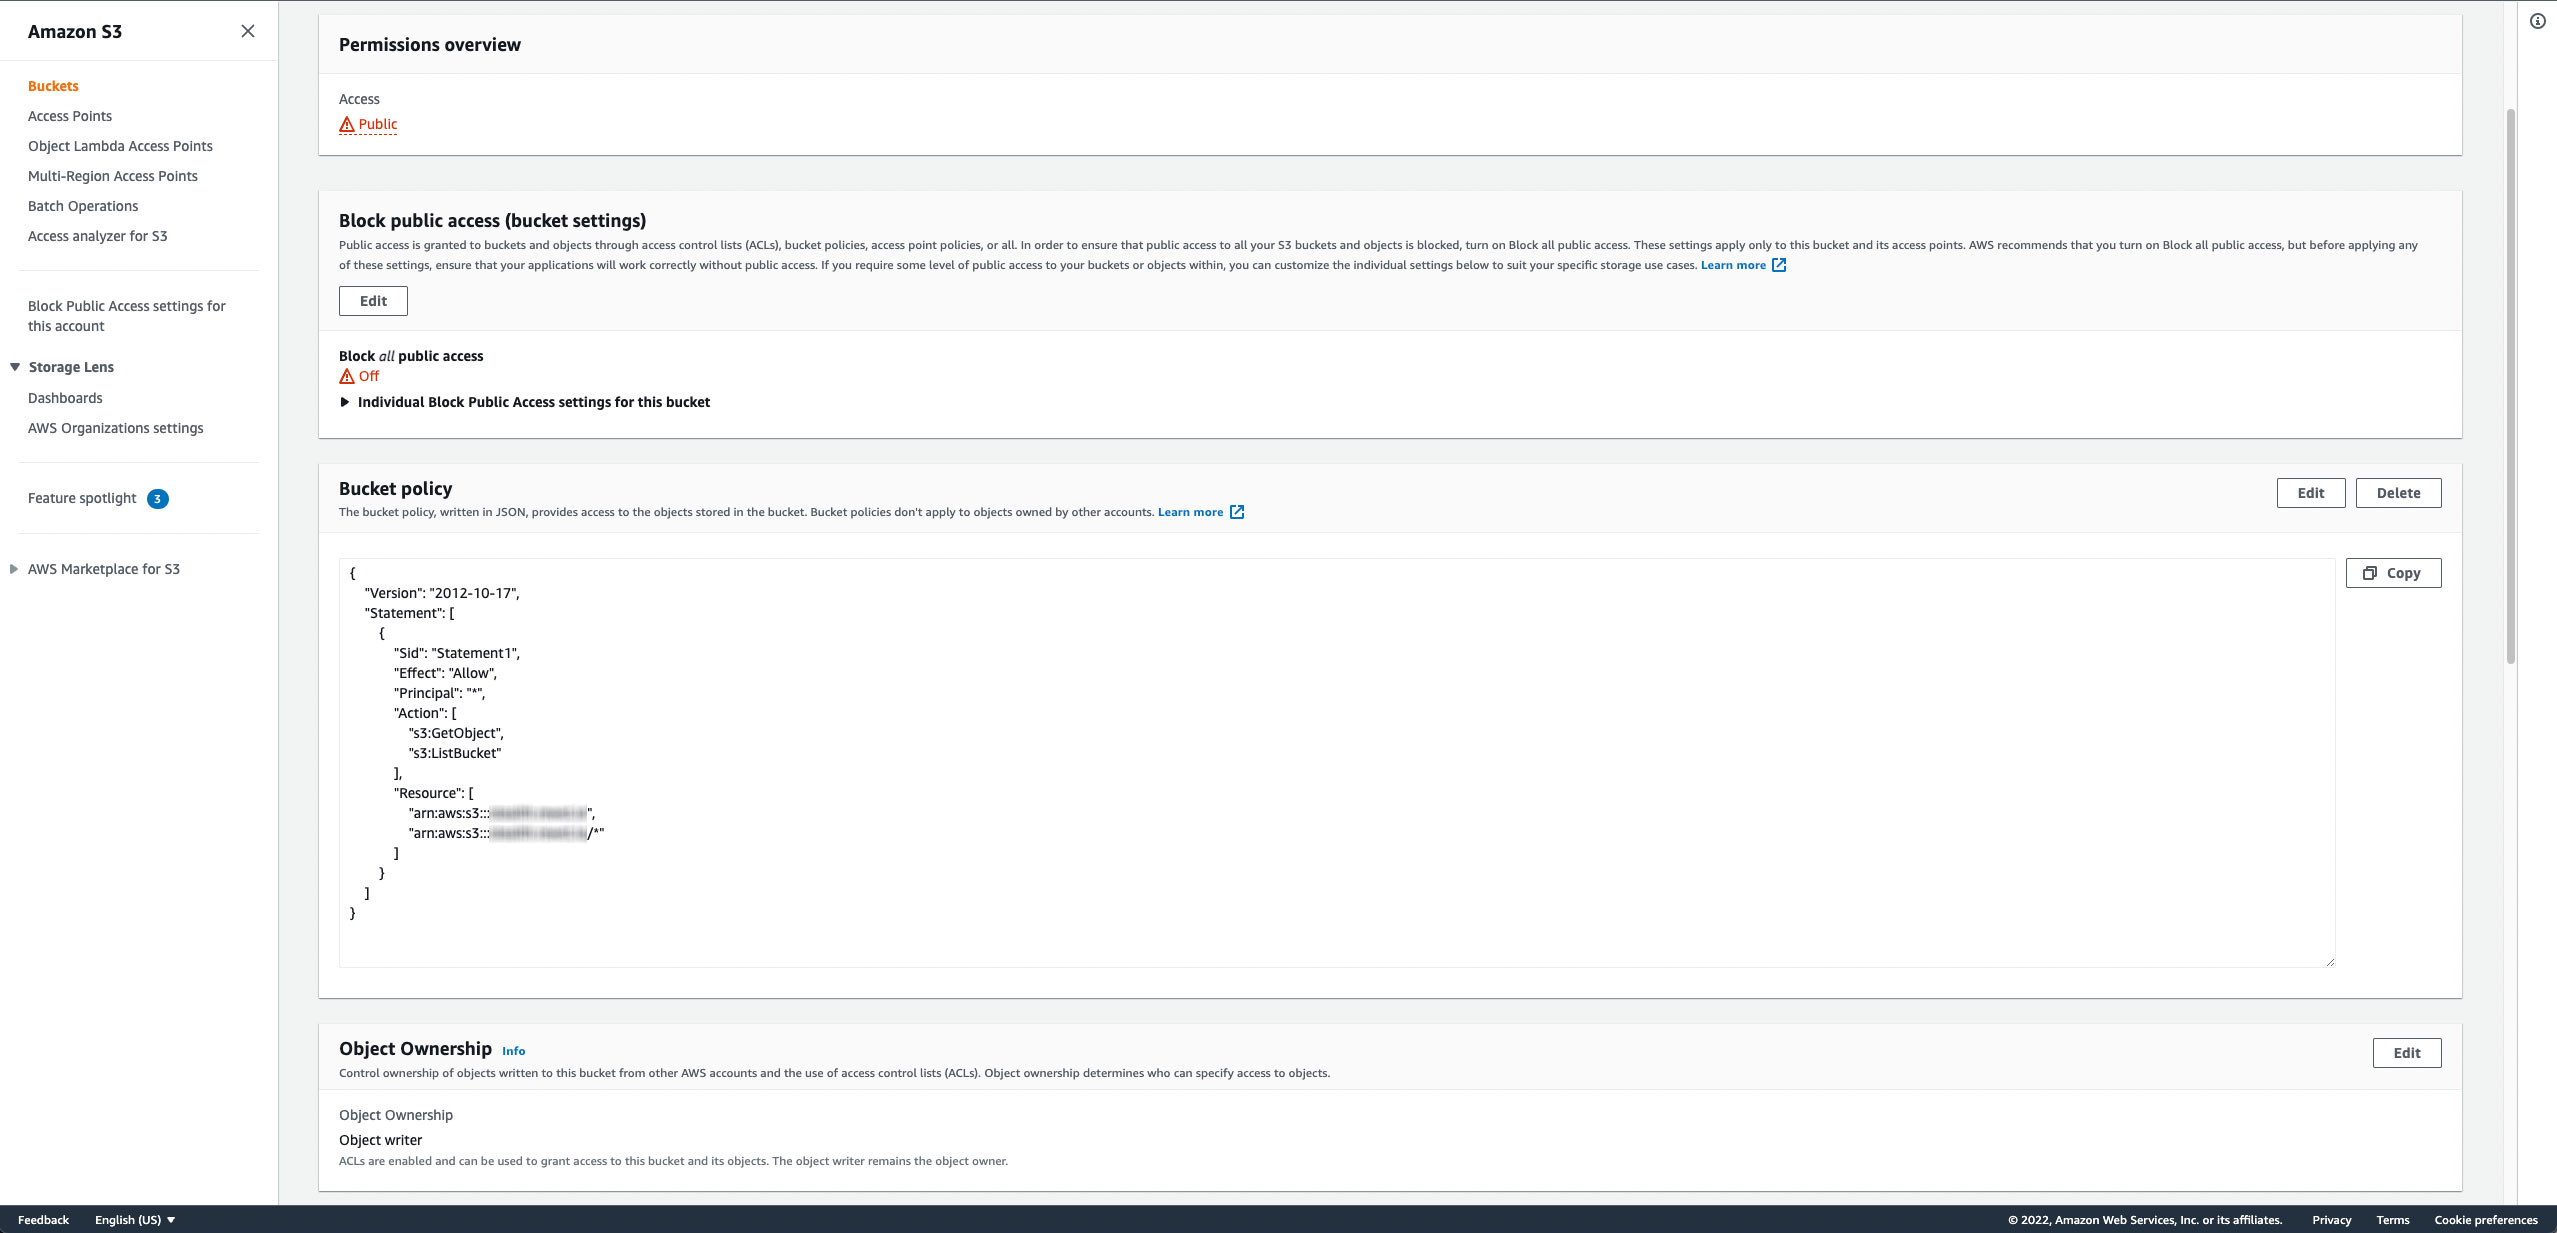
Now we need to change our Bucket Permissions so click on the Permissions tab and in Bucket Policy click Edit and copy/paste the following Bucket policy and replace the your_bucket_name portion with your bucket name or just copy/paste your buckets ARN and make sure the second entry has a trailing /*.
{
    "Version": "2012-10-17",
    "Statement": [
        {
            "Sid": "Statement1",
            "Effect": "Allow",
            "Principal": "*",
            "Action": [
                "s3:GetObject",
                "s3:ListBucket"
            ],
            "Resource": [
                "arn:aws:s3:::your_bucket_name",
                "arn:aws:s3:::your_bucket_name/*"
            ]
        }
    ]
}
Click Save changes and your Bucket policy should now look something like this:
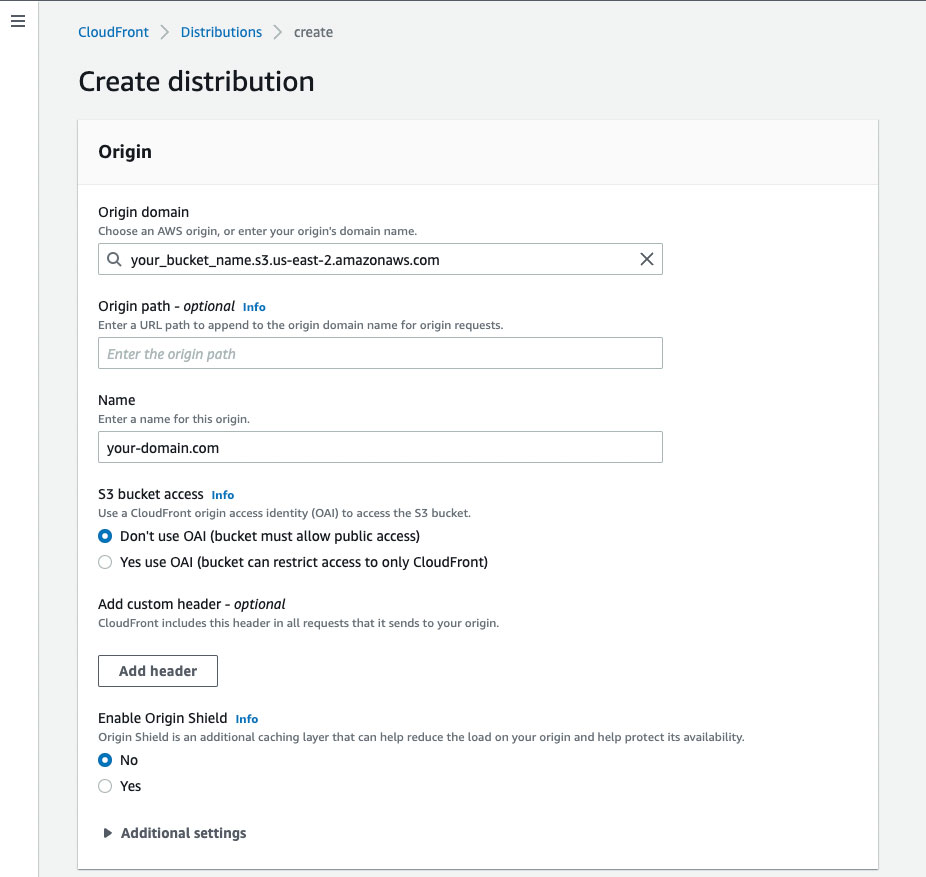
On the main menu type Cloudfront in the search bar and hit enter. Once on the Cloudfront Dashboard click on the Create distribution to be taken to the distribution wizard.
Under the Origin settings we need to select the AWS origin of our S3 bucket if should look something like: your_bucker_name.s3.amazonaws.com leave the Origin path input field empty and for the Name input enter your-domain.com.
For your S3 bucket access select Don’t use OAI and for Enable Origin Shiled select No
Your Origin settings should look like this:
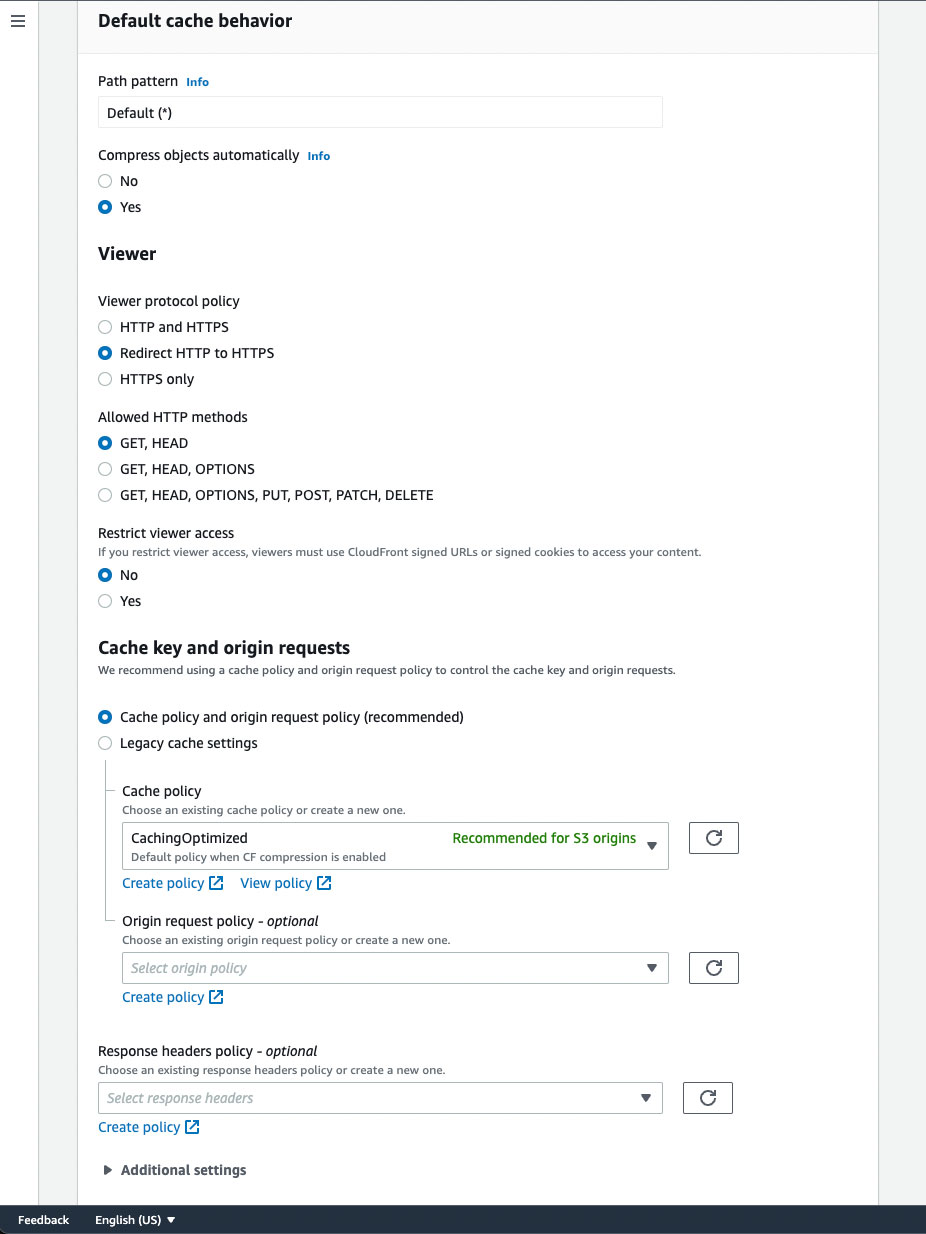
For your Default cache behavior Path should be Default(*), Compress objects automatically should have Yes selected. Viewer protocol policy select Redirect HTTP to HTTPS, Allowed HTTP methods select Get,Head, Restrict viewer access select No. Cache policy and origin request policy shoudl be selected.
In Distribution settings we just need to ensure we add a Alternate domain name (CNAME) with the domain we want to use your-domain.com select your SSL certificate or request a new one. Default root object input should have index.html.
Finally click on Create distribution
I’d like to tell you we are done but unfortunately we’re not (thanks AWS).
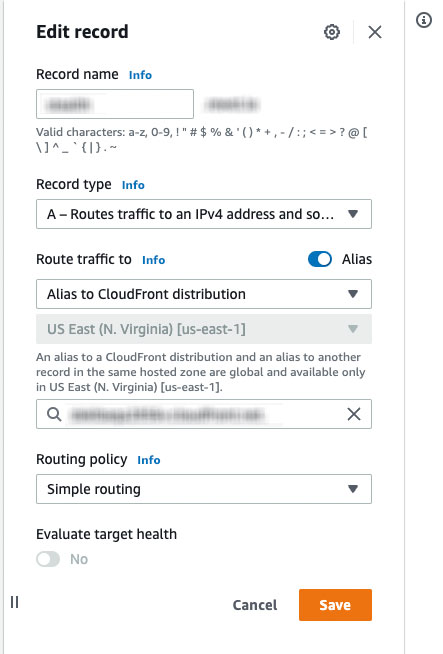
Now we need to make some changes in our Route 53
Record name leave blank unless the site you are hosting is on a subdomain. Record type should be A - Routes traffic to an IPV4 address and some AWS resources. Route traffic to select Alias to Cloudfront distribution Choose distribution select your Cloudfront distribution and Routing policy should be set to Simple routing
Click Save
I sure hope so, check you’re site, it should 🤔 be working if it’s not try Invalidating your Cloudfront Cache if it’s still not working 🤷 well then 💩 leave a comment and tell me how useless writing all this was, thanks for reading.